- Federico Pizzutto
- Jan 22, 2021
- 6 min read
Updated: Sep 14, 2022
Your Client has invited you to work with them on Liquid; here’s how to create and set up your Liquid account.
Welcome to Liquid — a platform for contracts, projects, and payments to independent contractors, freelancers, vendors, and suppliers. We support secure payments to 175+ countries worldwide in 2-3 business days.
If one of your Clients has invited you to join Liquid, here’s how to create and set up your Liquid account.
Creating your Vendor account in Liquid
Start by clicking the Accept Invite button in Liquid’s email that notified you that you’ve been invited to work with your Client on Liquid. This will open in your browser the official invitation from your Client. Press the Accept Invitation button to get started.
You will be prompted to Log In or Create an Account. Go to Create Account, complete the form, and then press the Create Account button. This will create your account and log you in.
The next screen will prompt you to create your business, which is required in order to accept the invitation from your Client. A business can be an individual, group, or business entity that does work for an inviter. If you have incorporated or organized a legal entity to do business, then you’ll complete the setup as that entity. If you do business as yourself, you’ll want to complete the setup as yourself (as an individual or sole proprietor).
Business Profile Setup in Liquid
The first step of the Business Profile setup is to enter the email address for notifications for this business. In most cases, you’ll want to keep this as your login address. This notification email will be shown to your Clients.
Next, you’ll select whether you use a business entity to work for your Clients. If you say Yes, you’ll choose the business structure of the entity you use. If you work as an individual or sole proprietor, do not have an entity, or have a disregarded entity and file taxes for your business as yourself, select No.
Enter the name of your business. If you work as an individual or sole proprietor or do not have an entity, enter your name.
The next step is to enter the country in which you are located and your business address. After this, enter your US Tax ID if you are a US citizen, resident, or other entity with a US Tax ID. If you are not located in the United States, the Tax ID step will be optional.
LLC options in Business Profile Setup in Liquid
If you have a multi-member LLC, then you should pick the option that matches how you have chosen to have your LLC treated for tax purposes:
LLC – C Corporation
LLC – S Corporation
LLC – Partnership
If you have a single-member LLC that is treated as a disregarded entity, you should pick sole proprietorship because you file taxes as yourself.
Finance Setup for US bank accounts in Liquid
Next, you’ll set up your bank account in Liquid which is required to receive payments from your Clients in Liquid. If you are in the United States, you will use Plaid to set up your account. Plaid is used by companies like American Express and Venmo to authenticate and verify bank accounts instantly. This enables Liquid to facilitate quick transfers between accounts via ACH. Plaid is very secure and connects to more than 10,000+ US financial institutions and is used by more than 3,000 financial apps and services (including Liquid).
In some cases, you’ll be able to find your bank and enter your login information for that bank; in other cases, you’ll have to add your bank routing number and account number manually. If you manually enter your bank information, you’ll have to check your bank for the micro deposit accounts to verify your bank account in 1-2 days after completing the setup.
After completing the Plaid setup, you’ll enter your account holder’s information. Check this information carefully as it must match your bank account’s details or payments to you made by delayed or even canceled.
For more details on setting up your bank account, read this piece on setting up your US bank account.
After completing the Finance Setup, press the Start button on the You’re Done step to complete the creation of your Vendor account in Liquid.
Finance Setup for International bank accounts in Liquid
If you are located elsewhere in the world, you will be prompted to let us know your preference for being paid in US dollars or in your local currency. At the moment, Liquid only supports payments in US dollars, but if you select a local currency, then you will be notified when that option becomes available.
If payments to your country are currently available via US dollars, then you will be prompted to complete a bank account form. This bank account form will be specific to your country, but here are some fields that you should be prepared to complete:
Business account or Personal account. We need to know whether your account is a business account or a personal account to properly initiate payments to you.
Bank Account holder Name and Address (please do not use any initials, as this may slow down payment processing)
Note that the country should be locked to the country you’ve selected for your business address.
Bank account number and/or IBAN
Name of Bank and bank branch address
Note that the country should be locked to the country you’ve selected for your business address.
Bank SWIFT code
Intermediary bank name and address (if applicable, this will be provided by your bank)
Note that the country of your intermediary bank should be the USA.
Intermediary bank SWIFT code (if applicable, this will be provided by your bank)
Be sure to check (and double-check) this information before submitting it. If your information is incorrect, payouts may be prevented, failed, or delayed.
For more details on setting up your bank account, read this piece on setting up your international bank account.
After completing the Finance Setup, press the Start button on the You’re Done step to complete the creation of your Vendor account in Liquid.
Starting your Client’s onboarding process in Liquid
Once you have finished creating your Vendor account in Liquid, the next step is to complete your Client’s onboarding process. This should pop up immediately upon creating your account if you clicked the Accept Invite button in your email.
If you don’t see it pop up, go back to your email, find the email from Liquid that notified you that you’ve been invited to work with your Client on Liquid, and click the Accept Invite button. This will open in your browser the official invitation from your Client. Press the Accept Invitation button to get started. Then, you will be prompted to confirm which business will be the official vendor for your Client. Make sure your business is selected, and then press the Accept Invitation button.
What are onboarding processes on Liquid?
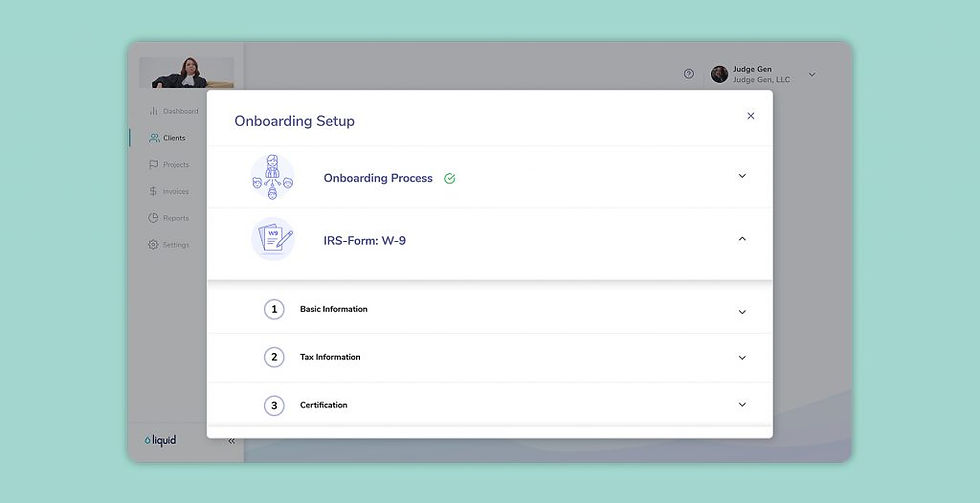
To join a Client on Liquid, a Vendor must be invited to work with that company with an onboarding process. An onboarding process is simply a set of contracts, documents, and tax forms that your Client would like you to fill out, sign, and date before starting work. You may be familiar with completing this type of paperwork in person during Client meetings. Liquid simplifies this process by helping Clients and Vendors complete this process online, allowing both parties to keep such documents and forms organized and up-to-date.
Depending on what your Client has chosen, the specific onboarding process you are presented with may be different. Usually, the first document is a Master Contract, which is the overarching agreement between you and your Client. The second document is usually a Confidential Information and Inventions Assignment Agreement (NDA), which protects both you and your Client’s proprietary information. If your Client has customized their onboarding process, you may also be presented with other documents or forms.
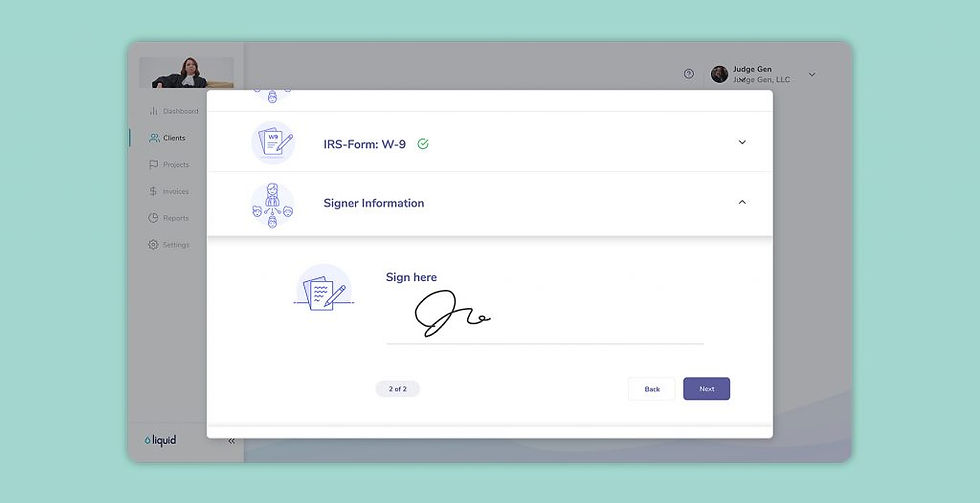
On Liquid, since all Clients are US entities, all onboarding processes include a United States IRS tax form — W-9 for US citizens and residents and W-8 for international vendors. This is typically the final step in the onboarding process. If you have received the wrong IRS tax form, please contact support@poweredbyliquid.com to let us know. Previous


What if I’ve already completed paperwork offline or on another platform?
If you and your Client have already completed paperwork offline or on another platform, then your Client may have chosen to:
have you complete paperwork again on Liquid; or
have uploaded your offline paperwork to Liquid; or
have uploaded a dummy document that lists information about where the paperwork is stored.
In all cases, you will still be presented with a US IRS tax form — W-9 for US citizens and residents and W-8 for international vendors. This will allow your Client to expedite sending IRS Form 1099 in January if one is required for your engagement. If you have received the wrong IRS tax form, please contact support@poweredbyliquid.com to let us know.
Next steps on Liquid
Once you have set up your account and completed your Client’s onboarding process, you will see your Client listed under the Clients section. If you have started but not completed your Client’s onboarding process (or if they have sent you additional documents or forms to complete), then you will see a badge that says IN PROCESS. Click the badge to finish onboarding.
Once onboarding has been completed, you will be able to send your Client a project proposal. If your bank account has been verified, then you will be able to send them an invoice.
Need help with Liquid? Use the chat to reach out to us anytime!

コメント